Custom Groups
 Updated
by
Arianne G.
Updated
by
Arianne G.
Using Custom Groups, you can create groups of adjusters, contractors, or reinspectors for reporting purposes. For example, if you created a group of five adjusters in Custom Groups, the group would appear as an option in the Custom Groups filter on the M.I. (Management Information) page. If you selected this group and then generated the report, the report would show data based on only the five adjusters in that group. These groups can only be comprised of adjusters, contractors, or reinspectors that use Xactimate® to work on assignments.
The screen shots in this document are generic, and your company’s interface may vary.
Related: M.I. (Management Information)
Access Custom Groups
- Select Custom Groups from the Administration menu.
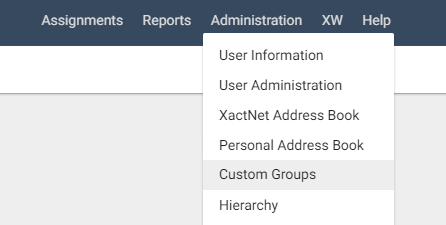
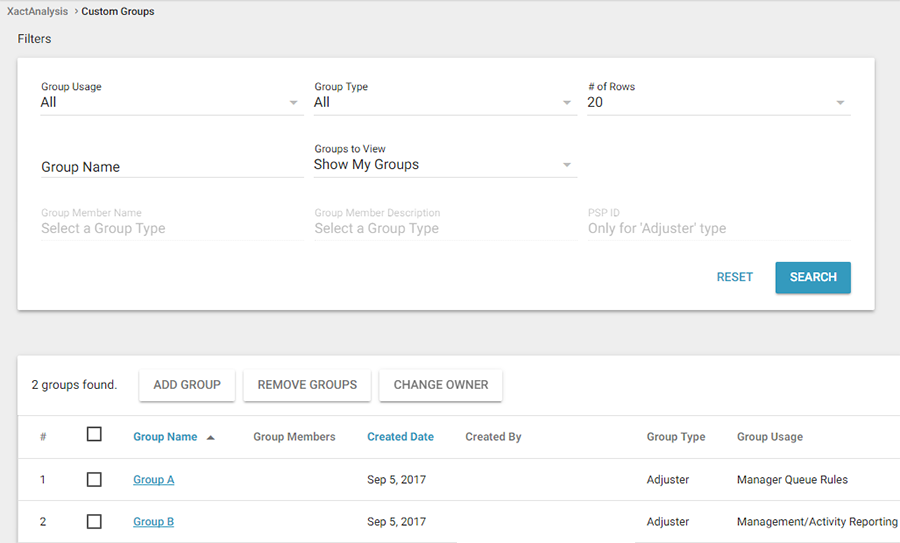
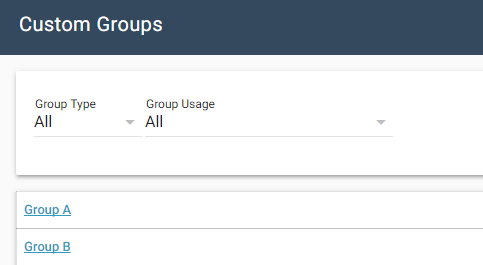
The Custom Groups page appears. From here you can view existing groups, add groups, and remove groups.
You can search the custom group list by group type (adjuster/contractor/reinspector), group name, group member name, and XactNet® address. You can also choose to view all groups, or only the groups you created.
- To search, select the appropriate criteria and click Search.
Add a group
- In the Custom Groups page, click Add Group. The Add Group dialogue box appears.
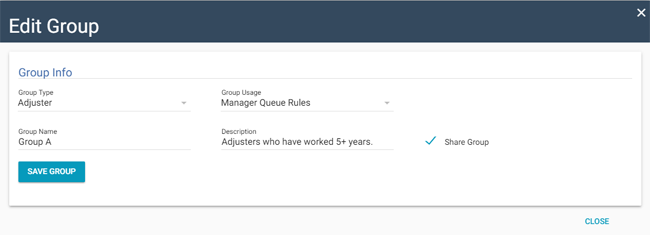
- Select a group type:
Adjuster
Select this option to add individuals to the group.
Contractor
Select this option to add whole companies (including all their employees) to the group.
XactAnalysis User
Select this option to create a group for Personal Rules.
- If available, select a group usage:
Management Information
Select this option for groups that can be used to create Management information reports.
Manager Queue Rules
Select this option for groups that can be used to create Payment Queue rules.
Personal Rules
Select this option for groups that can be applied to Personal Rules.
- Enter a group name and description
- Select the Share Group check box to share the group with other users.
- Click Save. The Edit Group dialogue box appears.
Add and edit group members
There are two ways to add members to a group: you can use the Assign Member feature to add group members individually or the Import from Excel feature to import multiple group members.
Add group members individually
- In the Edit Group dialogue box, click Assign Member.
- In the Individual field, type the name or XactNet address of the first adjuster, contractor, or reinspector, and choose the name from the list that appears.
- Select a Start Date for each individual (the date XactAnalysis will start including this person in the group).
- Select an End Date for each individual (the date XactAnalysis will stop including this person in the group).
- Click Save.
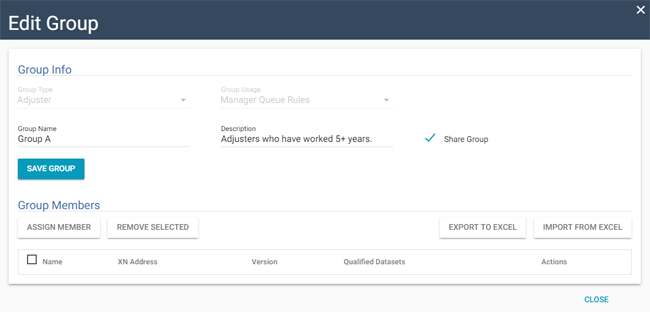
- Repeat steps 1–5 to add more adjusters/contractors to the group.
- When finished, click Save at the bottom of the dialogue box . Your new group appears in the Custom Groups page and in M.I. (Management Information).
Change group ownership
You can change ownership of an existing custom group to anyone in your company with Custom Groups administration rights.
- Select the check box for a group.
- Click the Change Owner button. The Assign New Group Owner dialogue box appears.
- Search for new group owner. You can search by first name, last name, or user ID.
- Click Search.
- Click the name of the person from the list that appears.
Import from Excel
When editing a group, you may also add group members by importing a list from Excel.
- In the Edit Group dialogue box , click Import from Excel.
- Click Browse and select the file you wish to import.
- Click OK.
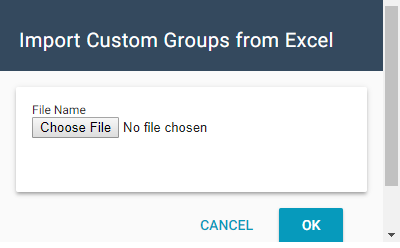
- Your group members appear in the Edit Group dialogue box .
- Select a Start Date for each individual (the date XactAnalysis will start including this person in the group).
- Select an End Date for each individual (the date XactAnalysis will stop including this person in the group).
- Click Save.
Export to Excel
- To export a group to an Excel spreadsheet, click Export to Excel and save the file to your computer.
Use custom groups in M.I. (Management Information)
In M.I. (Management Information) you can generate reports with data based solely on the individuals in your custom groups.
- Under Report Criteria, select Custom Group.
- Click the Area SmartList button. The Custom Groups dialogue box appears.
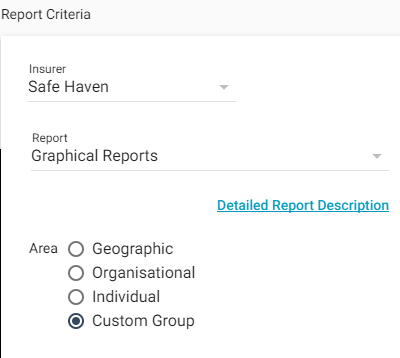
- Select a Group Type.
- Select a Custom Group to report on.
- Run the report as you normally would. The report data is based on the members in the group you selected.