Queue Admin
 Updated
by
Arianne G.
Updated
by
Arianne G.
The Queue Admin page allows you to add, edit, and delete rules for the Estimate Review Queue.
The screen shots in this document are generic, and your company’s interface may vary.
Access Queue Admin
There are two ways to access the Admin Queue:
- Select Queue Admin from the Administration menu.

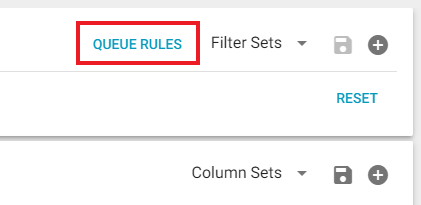
From Search, click the Queue Rules button in the top right corner.
Filter rules
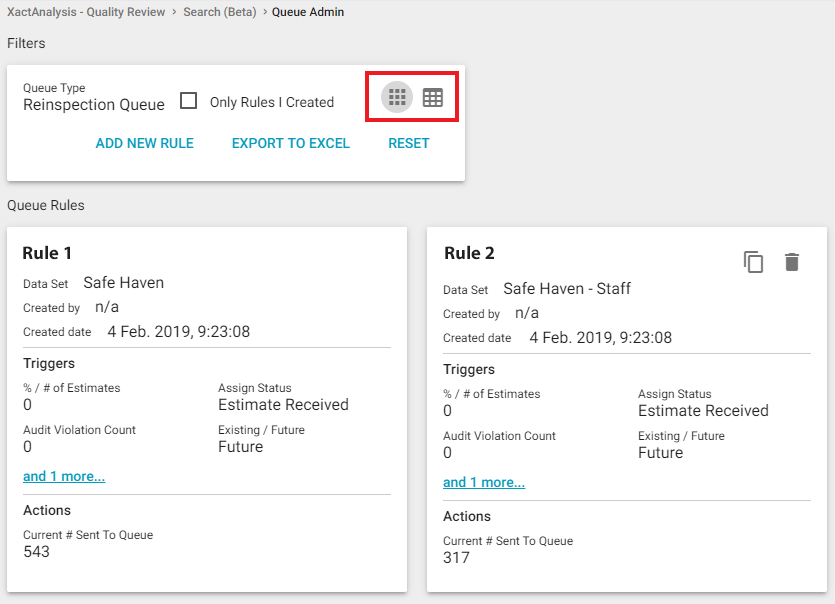
The Filters section allows you to select which types of rules are displayed, export the list to Excel, and change how the list is displayed.
Only Rules I Created
When this check box is selected, the list only displays rules that you created.
Views
You can click either of the two icons in the right corner of the section to change the way the list is displayed (see image above).
- Table view displays each rule as a row in a table.
- Card view displays each rule as an individual card.
Export to Excel
Click this button to export all of the rules displayed in the list to an Excel spreadsheet.
Existing Queue Rules
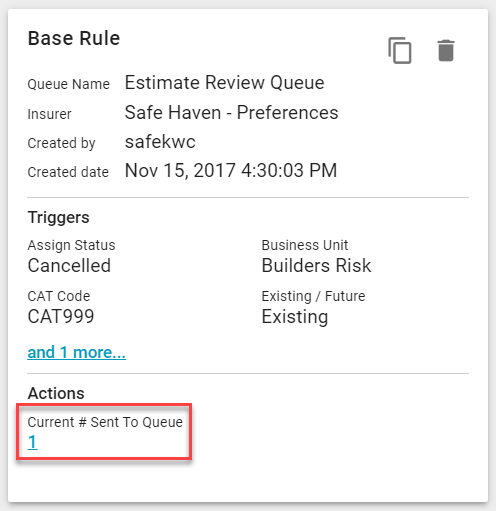
After they’re created, rules appear as cards beneath the filters. Each card displays basic information about the rule, what triggers the rule, and what actions occur when the rule is triggered. At the bottom of each card is a linked number under Current # Sent to Queue. Clicking the number opens a new browser tab that displays the claims caught by the rule in Search.
Add a rule
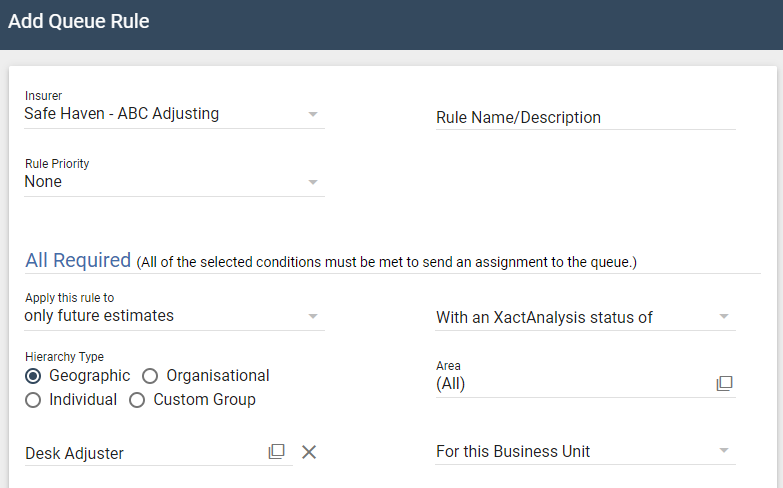
- Click Add New Rule. The Add Queue Rule dialogue box appears.
- Select the criteria for your rule and click OK. For more information about the fields and menus in this dialogue box, see Add Queue Rule fields and menus.